In summary:
- Suction cup grab bars are dangerously unreliable due to their low, static weight rating and susceptibility to catastrophic failure under dynamic loads.
- Grab bar angle is functional: horizontal for pushing/pulling stability, vertical for sit-to-stand pulling leverage, and diagonal as a compromise.
- Installation must anchor into wall studs or use specialized hollow-wall anchors designed for grab bars; proper stress-testing is non-negotiable.
- Optimal placement is not one-size-fits-all; it must match the user’s specific movements and body mechanics to prevent, not cause, strain.
Installing a grab bar seems straightforward: find a stud, drill some holes, and you’re done. Many online guides and even product instructions reinforce this simplistic view, often just quoting generic ADA height requirements. This approach treats a critical safety device like a simple towel rack, focusing only on keeping it attached to the wall. But what if the user pulls sideways during a slip? What if the height is wrong and causes shoulder strain with every use? These are the questions that a simple set of rules fails to answer.
The common advice overlooks the fundamental physics of human movement. A grab bar isn’t just a static handle; it is an integrated part of a user’s kinetic chain. Its true purpose is to provide biomechanical leverage at the precise moment it’s needed, counteracting the specific forces generated during a loss of balance or a difficult transition, like standing from a seated position. Relying on generic measurements without understanding the underlying principles is a gamble.
This guide reframes the entire process. Instead of just asking « where, » we will ask « why. » We will abandon the one-size-fits-all mentality and adopt the precision of a biomechanics expert. You will learn to analyze movement, understand force vectors, and see the grab bar not as a piece of hardware, but as a personalized extension of the body’s own support system. This is how you move from simply installing a bar to engineering a truly safe environment.
For those who prefer a visual summary, the following video offers a demonstration of how to think about grab bar placement for different areas of the bathroom, complementing the detailed biomechanical principles discussed in this guide.
This article is structured to build your expertise systematically. We’ll begin by dissecting common but dangerous mistakes, then move through the core principles of placement, material selection, and installation verification. Each section provides the technical knowledge needed to make informed, life-saving decisions.
Summary: A Biomechanical Approach to Grab Bar Installation
- Why Suction Cup Grab Bars Are a Death Trap for Seniors?
- Vertical vs Horizontal vs Diagonal: Which Bar Angle Helps You Stand Up?
- How to Find Studs Behind Tiled Walls Without Cracking the Ceramic?
- Smooth vs Knurled: Which Finish Prevents Slipping with Soapy Hands?
- How to Stress-Test Your Grab Bar Installation Before Relying on It?
- The Fitting Error That Causes Back Pain When Using a New Device
- How to Select a Built-In Shower Seat That Doesn’t Collect Mold?
- Which Non-Slip Floor Coverings Offer the Best Safety Rating for Kitchens?
Why Suction Cup Grab Bars Are a Death Trap for Seniors?
The appeal of a suction cup grab bar is its simplicity: no tools, no drilling, no permanent marks. However, from a biomechanical and safety engineering perspective, this convenience creates a deadly illusion of security. The fundamental flaw lies in their inability to handle dynamic, multi-directional forces—the very forces exerted during an actual fall. A person slipping does not apply a slow, steady, downward pull; they generate a sudden, high-impact shock load, often combined with a shearing (sideways) or tensile (outward) force vector. Suction cups are not designed to withstand this.
Their holding power is entirely dependent on a perfect, non-porous surface and the maintenance of a vacuum seal. Grout lines, microscopic surface imperfections, temperature changes, and soap residue can all compromise this seal over time without any visible warning. A bar that feels secure one moment can catastrophically fail the next. Critically, most suction bars are only rated to support 100-150 pounds under ideal, static conditions. This is dangerously inadequate for supporting the dynamic weight of a falling adult.
This false sense of security is precisely what makes them so hazardous. A user comes to rely on the device for support, integrating it into their daily movement patterns. When it fails, the result is often a more severe fall than would have occurred without any bar at all, as the user is already off-balance and committed to the movement. As one expert from the National Association of Home Builders states:
These devices give a false sense of security. When they fail — and they do — the results are catastrophic.
– Certified Aging-in-Place Specialist (CAPS), National Association of Home Builders
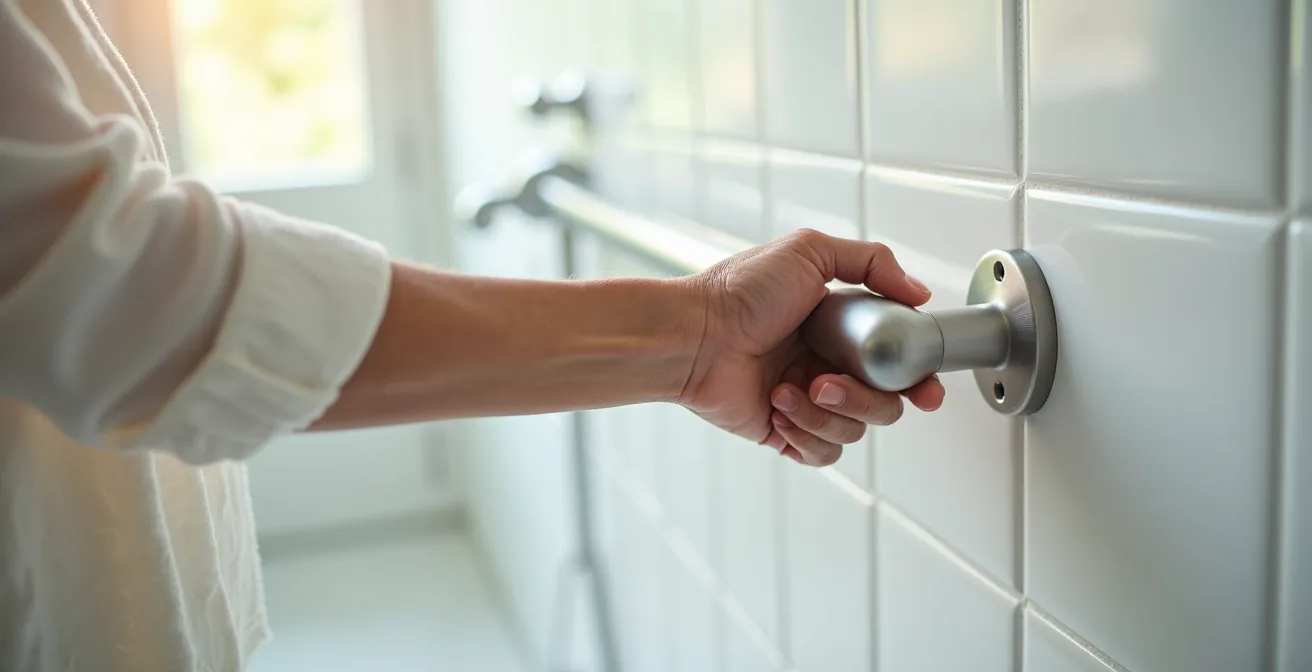
The only valid use for a suction cup device is as a temporary hand rest for balance while standing still, never as a grab bar for leverage or fall prevention. True safety requires a permanent, mechanical bond to the structure of the building.
Vertical vs Horizontal vs Diagonal: Which Bar Angle Helps You Stand Up?
The orientation of a grab bar is not an aesthetic choice; it is a functional decision dictated by the specific movement it is designed to assist. Each angle offers a different form of biomechanical leverage. The choice between horizontal, vertical, or diagonal placement depends entirely on the primary action the user will perform. Understanding the force vectors involved in pushing, pulling, and stabilizing is key to making the correct selection.
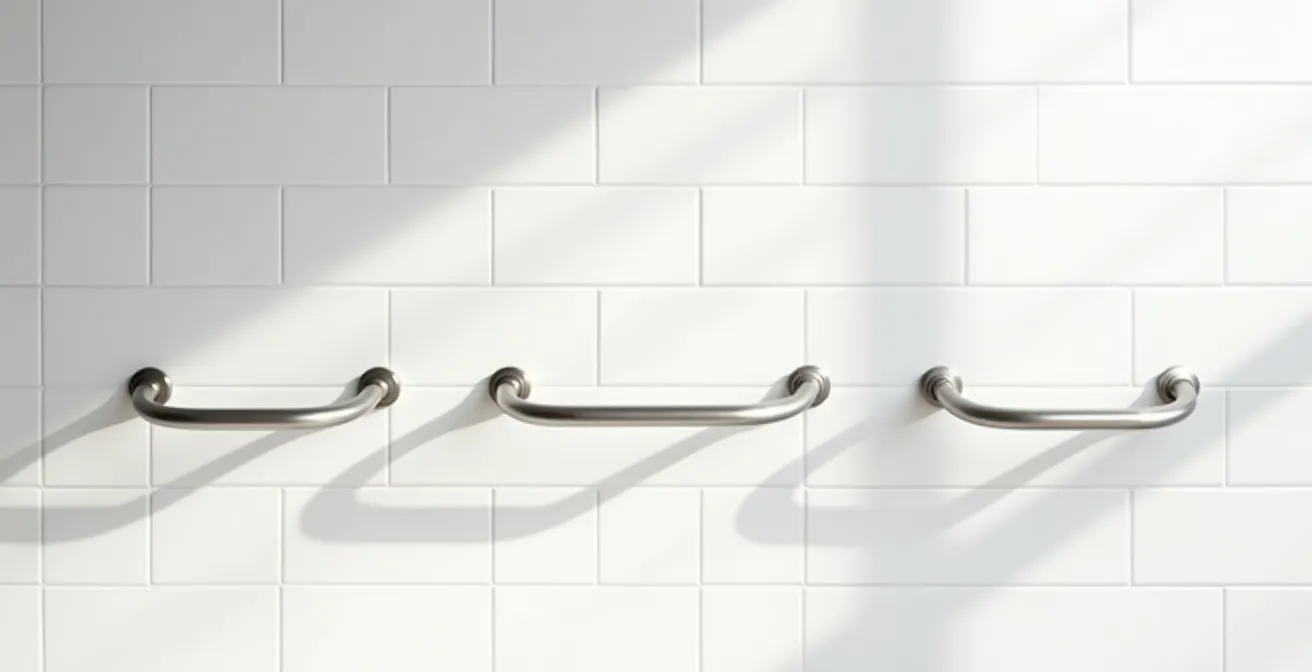
As the visual comparison shows, each orientation engages the muscles of the arm and torso differently:
- Horizontal Bars: These are ideal for pushing or pulling along a horizontal plane. Think of stabilizing oneself while standing or walking alongside a wall. The horizontal grip allows for force to be applied both downwards (for support) and forwards/backwards (for balance). They are excellent for general stability in a shower or along a hallway.
- Vertical Bars: These are superior for pulling motions, especially for sit-to-stand transitions. A vertical bar allows the user to maintain a natural, « hand-over-hand » motion, similar to climbing a ladder. This keeps the wrist in a neutral position and engages the powerful latissimus dorsi and bicep muscles for an efficient upward pull. A vertical bar at the entrance of a shower is a classic example.
- Diagonal (45-degree) Bars: A diagonal bar offers a compromise, providing some of the benefits of both horizontal and vertical orientations. Its primary advantage is that it follows the natural angle of the forearm and wrist when reaching for support, making it an ergonomically comfortable choice. It supports the diagonal force vector often used when lowering into or rising from a toilet or bath seat.
While general guidelines exist, such as the ADA recommendation that grab bars should be installed between 33-36 inches from the ground, the optimal choice of angle is a functional one. The best installation often involves a combination of bars to support a full sequence of movements.
How to Find Studs Behind Tiled Walls Without Cracking the Ceramic?
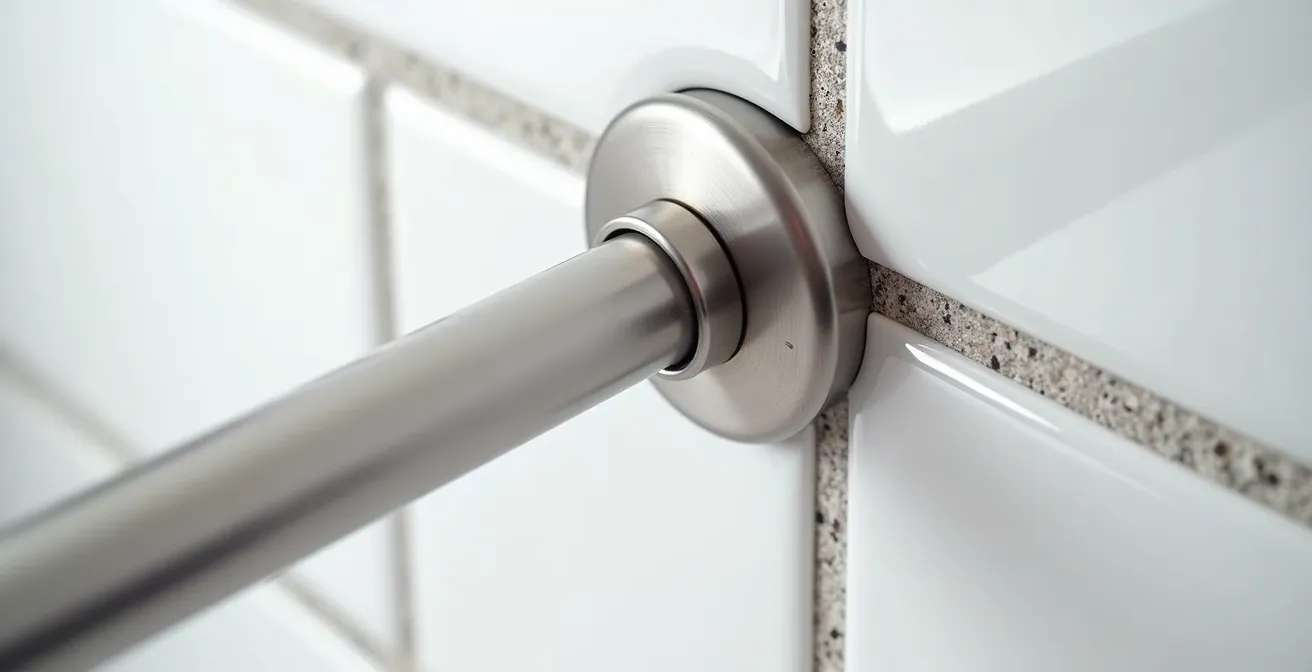
Anchoring a grab bar directly into wall studs is the gold standard for a secure installation. A stud provides a solid wood target that can withstand the immense shear and tensile forces of a fall. However, locating these studs behind a layer of tile, backer board, and potentially mortar presents a significant challenge for any DIYer. Using the wrong technique can lead to cracked tiles, a costly and time-consuming repair. The professional approach involves a multi-step process of detection and verification that minimizes risk.
The goal is to pinpoint the exact center of the stud before ever drilling a large-diameter hole. This requires patience and a combination of modern tools and traditional techniques. Relying solely on a stud finder is often insufficient, as tile and metal plumbing can produce false positives. Instead, a methodical process of narrowing down the location is required. This ensures that the mounting screws will bite securely into the core of the structural lumber.
Your Action Plan: Finding Studs Behind Tile Professionally
- Location Scanning: Use a high-quality electronic stud sensor to find the approximate location of the stud. Lightly mark the center with a pencil.
- Edge Probing: Above the tile line (in a less visible area), use a small finish nail or a fine drill bit to probe for the stud’s edges to confirm the sensor’s reading.
- Centerline Marking: Once both edges are found, mark them and use a level to extend these lines down to the desired grab bar height on the tile.
- Tape Guidance: Place a strip of 1.5-inch masking tape over the tile at the marked stud locations. This both protects the tile surface and provides a clear drilling guide.
- Bar Positioning: Position the grab bar so that at least two of its mounting holes on each end align perfectly with the marked centerlines of the studs.
While studs are the ideal anchor, building codes and wall construction don’t always place them exactly where a grab bar is needed for optimal biomechanical leverage. In these situations, it’s crucial not to compromise on safety. As noted by installation experts, a Plan B exists: « While studs are not always available, modern high-load hollow-wall anchoring systems designed specifically for grab bars can be equally strong when properly installed. » These systems distribute the load over a wider area of the wall, providing a secure alternative when a stud is out of reach.
Smooth vs Knurled: Which Finish Prevents Slipping with Soapy Hands?
The surface finish of a grab bar is a critical safety feature, directly impacting its coefficient of friction, especially in wet and soapy conditions. The debate often centers on smooth versus knurled (or peened) textures. While a textured surface intuitively seems to offer a better grip, a deeper analysis reveals a trade-off between initial grip, long-term hygiene, and skin safety. The optimal choice depends on balancing these factors to provide the most reliable and safe support system. A properly installed bathroom grab bar must be able to support 250 pounds minimum, and the grip is the first link in that chain of safety.
The primary concern in a shower environment is maintaining grip when hands are covered in soap and water. Knurling—a pattern of fine lines or diamonds pressed into the metal—increases the surface area and creates channels to displace water, which can improve initial grip. However, these same crevices present a significant hygiene problem, as they are difficult to clean and can harbor soap scum, mildew, and bacteria. For seniors with fragile or sensitive skin, the aggressive texture can also cause friction burns or abrasions during a slip.
To make an informed decision, it’s helpful to compare the performance characteristics of different finishes, as detailed by professional installers in the table below.
| Finish Type | Wet Grip Performance | Hygiene/Cleaning | Skin Safety |
|---|---|---|---|
| Smooth Stainless | Moderate | Excellent – Easy to sanitize | Safe for fragile skin |
| Knurled/Textured | Good initial grip | Poor – Harbors bacteria | Risk of friction burns |
| Silicone Coated | Superior wet grip | Good – Non-porous surface | Gentle on skin |
The analysis reveals that while knurling offers a good initial grip, its drawbacks in hygiene and skin safety make it a questionable choice for many users. Modern alternatives, such as silicone-coated bars, offer a superior solution. They provide a high-friction, « warm-to-the-touch » feel that is effective even when wet, without the cleaning or skin safety issues of traditional texturing. For most applications, a high-quality smooth or silicone-coated bar represents the best balance of safety, hygiene, and comfort.
How to Stress-Test Your Grab Bar Installation Before Relying on It?
The installation of a grab bar is not complete when the last screw is tightened. It is complete only after its structural integrity has been rigorously verified through a multi-stage stress test. This step is non-negotiable and is the only way to confirm that the bar, its fasteners, and the wall structure act as a single, unyielding unit capable of withstanding the sudden force vectors of a fall. For a DIYer, performing this test provides the ultimate peace of mind that the installation is truly life-safe. It moves the project from theoretical security to proven reliability.
A proper stress test is not a single, violent yank. It is a progressive protocol designed to identify any weakness in the kinetic chain—from the grip of the screws in the stud to the solidity of the tile itself. The process involves applying controlled force from different directions to simulate real-world scenarios. A professional installer follows a strict procedure to ensure nothing is overlooked.
Before allowing anyone to rely on the bar, perform the following verification steps:
- Initial Test: Grip the bar firmly with both hands in the center and pull straight out and then downwards. There should be absolutely no movement, flexing, or creaking sounds from the bar or the wall.
- Progressive Load: Gradually apply your body weight to the bar. Start with a partial load and incrementally increase it, carefully listening and watching the mounting points (flanges) for any sign of distress.
- Dynamic Test: Perform several controlled but forceful pulls on the bar in the directions it is most likely to be used. For a bar next to a toilet, this would be an upward and outward pull. For a shower bar, a straight downward and outward pull.
- Post-Test Inspection: After applying force, meticulously inspect the area around the mounting flanges. Look for any fine dust (indicating movement), new hairline cracks in the grout or tile, or any perceptible wiggle in the bar that wasn’t there before.
- One-Week Follow-Up: Material can settle. After one week of use, it’s wise to re-check the tightness of the mounting screws and repeat a quick pull test to ensure everything remains solid.
Any sign of movement, however small, is a critical failure. It indicates a weakness in the installation that must be addressed immediately. A secure grab bar will feel like an integral, immovable part of the wall itself.
The Fitting Error That Causes Back Pain When Using a New Device
A grab bar is installed to increase safety and reduce physical strain. Ironically, one of the most common fitting errors can do the opposite, creating chronic back pain by forcing the user into an unnatural posture. This occurs when the bar’s height or position creates an « ergonomic mismatch » with the user’s body mechanics. Instead of aiding a natural movement, the poorly placed bar forces the body to twist, over-reach, or bend in a way that puts undue stress on the lumbar spine. This is a subtle but significant issue, contributing to the staggering number of bathroom-related injuries seen annually. According to the CDC, approximately 235,000 people are injured in the bathroom each year, and while falls are the primary cause, chronic strain from poor ergonomics is a contributing factor.
The most common error is placing a bar based on a generic height measurement (like the 33-36 inch ADA guideline) without considering the specific user’s height and the movement being performed. For example, if a horizontal bar used for standing support in a shower is too low for a tall person, they must constantly bend their torso to use it, leading to lower back fatigue and pain. Conversely, if a vertical bar for a sit-to-stand motion is too high, it can cause shoulder impingement and force the user to hyperextend their back to get leverage.
The key to avoiding this ergonomic mismatch is personalization. The bar must be fitted to the individual like a tailored suit. A simple rule of thumb for a sit-to-stand bar is to position it so the user’s hand can grip it with their elbow at a 90-degree angle while seated. This ensures that the pulling force comes from the powerful muscles of the arm and back, not by straining the lower spine. Each placement must be considered in the context of the user’s kinetic chain, ensuring the bar works with the body, not against it.
Ultimately, a grab bar should feel like a natural extension of one’s own arm, providing support without requiring any conscious postural compensation. If using the bar feels awkward or causes even minor discomfort, it is a sign that the placement is wrong and needs to be re-evaluated before it leads to a more serious strain injury.
How to Select a Built-In Shower Seat That Doesn’t Collect Mold?
A built-in shower seat is an excellent addition for safety and comfort, but it can quickly become a hygiene problem if not selected and installed correctly. The warm, wet environment of a shower is a perfect breeding ground for mold and mildew. A poorly designed seat with water-trapping crevices or porous materials can become a persistent source of contamination. Therefore, selecting a seat requires looking beyond simple comfort and focusing on materials and design features that actively shed water and resist microbial growth.
The first line of defense is material choice. Natural wood like teak, while beautiful, is porous and requires regular oiling and maintenance to resist mold. A far superior choice for a low-maintenance, hygienic seat is a non-porous material. Options to consider include:
- Phenolic Resin: A dense, waterproof composite material that is completely impervious to water and bacteria. It is the material of choice for commercial and medical facilities.
- Solid Surface Composites: Materials like Corian or other engineered stone offer a seamless, non-porous surface that is easy to clean and highly resistant to mold.
- Coated Aluminum or Stainless Steel: Metal seats, often with a durable powder-coated or plastic finish, are also non-porous and effective.
Beyond material, the design of the seat is critical for water management. The seat must not allow water to pool. Look for designs that incorporate drainage holes or slats. Furthermore, the installation itself should be part of the water-shedding system. A professional will install the seat with a very slight, almost imperceptible 1-2 degree forward tilt to ensure water actively runs off the surface rather than sitting stagnant. Finally, as accessibility experts note, the seat’s position is inextricably linked to grab bar placement. « The seat’s height and depth are the primary factors that dictate the exact placement of the crucial sit-to-stand grab bar next to it for maximum leverage, » as stated in the Freedom Showers Accessibility Installation Guide. The seat is not an isolated component; it is an integral part of the bathroom’s entire safety system.
Key Takeaways
- True safety comes from biomechanical leverage, not just mounting strength. The bar must be an extension of the body’s natural movement.
- Bar orientation is functional: Horizontal for stabilization, Vertical for sit-to-stand leverage, and Diagonal for ergonomic comfort.
- Verification is non-negotiable. A multi-stage stress test is the only way to confirm an installation is life-safe before use.
Which Non-Slip Floor Coverings Offer the Best Safety Rating for Kitchens?
While this article focuses on grab bars, they are only one component of a comprehensive fall prevention system. The entire system can fail if the foundation—the floor—is not secure. A user’s feet must have a solid, non-slip purchase on the ground for any grab bar to be effective. Although this section’s title refers to kitchens, the principles of non-slip flooring are most critically applied in the bathroom, a high-risk zone where research shows that 80% of senior falls occur. The learnings here are, however, directly transferable to kitchens or any area prone to wet floors.
Choosing a safe bathroom floor involves more than just picking a tile with a rough texture. The key metric is the floor’s wet dynamic coefficient of friction (DCOF), which measures its slip resistance when wet. A higher DCOF rating indicates better traction. Beyond texture, factors like grout lines, surface porosity, and ease of cleaning all play a role in long-term safety. A floor that is hard to clean may develop a film of soap scum or biofilm that negates its original non-slip properties.
The following table, based on recommendations from health and safety experts, compares common flooring options for their effectiveness in a wet environment.
| Surface Type | Slip Resistance | Maintenance | Transition Safety |
|---|---|---|---|
| Textured Tile | Good when dry and wet | Grout lines need regular cleaning | Can catch shuffling feet |
| Poured Resin with Quartz | Excellent grip | Seamless, easy to clean | Smooth transitions possible |
| Non-Slip Vinyl | Good wet traction | Simple maintenance | Requires proper edge sealing |
From a safety engineering perspective, a poured resin floor with an integrated quartz aggregate is often the superior choice. Its seamless nature eliminates grout lines, which are both a cleaning headache and a potential trip hazard. The embedded aggregate provides excellent, consistent grip across the entire surface. While textured tile is a common choice, care must be taken to use narrow grout lines to minimize the risk of catching a foot during a shuffle-step, a common gait pattern in older adults. Ultimately, the floor must be considered the anchor of the room’s entire kinetic safety chain.
By moving beyond generic rules and adopting a personalized, biomechanical approach, you transform the installation of a grab bar from a simple DIY task into a professional-grade safety intervention. A correctly placed bar, surface, and floor work in concert to create an environment that doesn’t just prevent falls but actively enhances mobility and confidence.