
Choosing the right mobility aid for a small apartment isn’t a medical decision—it’s an architectural one.
- The device’s turning radius and ability to navigate tight corners is more critical than its top-line stability for indoor use.
- Common layout flaws, like door swing direction and toilet placement, can render a perfectly good device unusable in key areas like the bathroom.
Recommendation: Before buying anything, conduct a simple « spatial audit » of your home’s pathways and doorways to understand the geometric constraints. The best device fits your home’s layout, not just your body.
The decision seems straightforward: you need more support, so you get a walker or a rollator. Many urban seniors, however, discover a frustrating reality only after the purchase is made. That new, feature-rich rollator that felt so stable in the store suddenly becomes a metal barricade, unable to pass through the bathroom doorway or make the tight turn into the bedroom. The standard advice often revolves around broad comparisons—walkers for stability, rollators for mobility—or a simple suggestion to « measure your doorways. »
While well-intentioned, this advice misses the crucial point for anyone living in a compact or older apartment. The real challenge isn’t just about the width of the device, but about the entire geometry of movement within a constrained environment. It’s about understanding the hidden spatial traps in your own home: the way a hinged door subtracts precious inches from a doorway, the tight 90-degree turn in a hallway, or the lack of turnaround space in a galley kitchen.
But what if the key wasn’t just choosing a device, but learning to see your own home through the eyes of an accessibility designer? This guide moves beyond generic comparisons. We will analyze the specific spatial challenges that make small apartments unique. We’ll explore how to use a mobility aid correctly to maximize safety, why a 3-wheel rollator might outperform a 4-wheel model indoors, and how to arrange your layout to preserve your independence. It’s time to find the device that fits not just you, but the unique landscape of your home.
This article provides a structured approach to making that choice. Below is a summary of the key spatial considerations we will explore to help you navigate your home safely and confidently.
Summary: A Practical Guide to Mobility Aids for Compact Living
- Why Standard Rollators Get Stuck in Older Apartment Doorways?
- How to Walk inside the Frame Instead of Pushing It Like a Shopping Cart?
- The Brake-Locking Mistake That Causes Rollators to Slide Away
- 3-Wheel vs 4-Wheel Rollators: Which Is Truly More Maneuverable Indoors?
- When to Switch From a Cane to a Walker for Indoor Safety?
- The « Sentimental Clutter » Error That Blocks Walker Access
- The Bathroom layout Error That Makes It Impossible to Use a Walker
- How to Arrange Your Home Layout to Maintain Independence Without Help?
Why Standard Rollators Get Stuck in Older Apartment Doorways?
The primary reason a standard rollator fails in an older apartment isn’t always its absolute width, but its poor performance in tight transitions. Older buildings often have non-standard, narrower doorways. When you factor in the door itself, you can lose more space. A study on home modifications highlights that you must account for hinged doors which may lose an additional 2 inches from the doorway’s clear width. This is a classic spatial trap where a 28-inch rollator simply cannot pass through a 30-inch doorway once the door and frame are considered.
Furthermore, standard 4-wheel rollators have a larger turning radius. Navigating a 90-degree turn from a narrow hallway into a room requires a wide arc that small apartments don’t have. This forces a multi-point turn—a frustrating and potentially unstable shuffle—just to get into a room. Devices designed for this environment prioritize a smaller footprint and a tighter turning radius.
For instance, some models like the NOVA Traveler use a 3-wheel, triangular design specifically to combat this issue. With a single wheel in front, the device can pivot almost on the spot, making it far more agile in the tight corridors and around the sharp corners typical of compact living spaces. This isn’t about one brand being better, but about understanding the design principle: for indoor use in tight spaces, maneuverability often trumps maximum stability.
Ultimately, the goal is to match the geometry of the device to the geometry of your home, ensuring it serves as a key to independence, not a cage.
How to Walk inside the Frame Instead of Pushing It Like a Shopping Cart?
A common misuse of a walker is pushing it far ahead like a shopping cart. This habit is dangerous because it places your center of gravity behind the device, forcing you to lean forward and increasing your risk of pitching forward if the walker stops suddenly. The correct technique is to move the walker a short step forward, then step *into* the frame. Your body should remain upright, with your hips aligned with the walker’s rear legs. This keeps your center of gravity safely contained within the walker’s base of support.
This simple change in posture transforms the walker from something you push to something that moves with you, providing a stable frame you walk within. To achieve this, your hands should rest comfortably on the grips with a slight bend in your elbows. If you have to hunch over to reach the handles, the walker is too low. If your arms are straight, it’s too high.
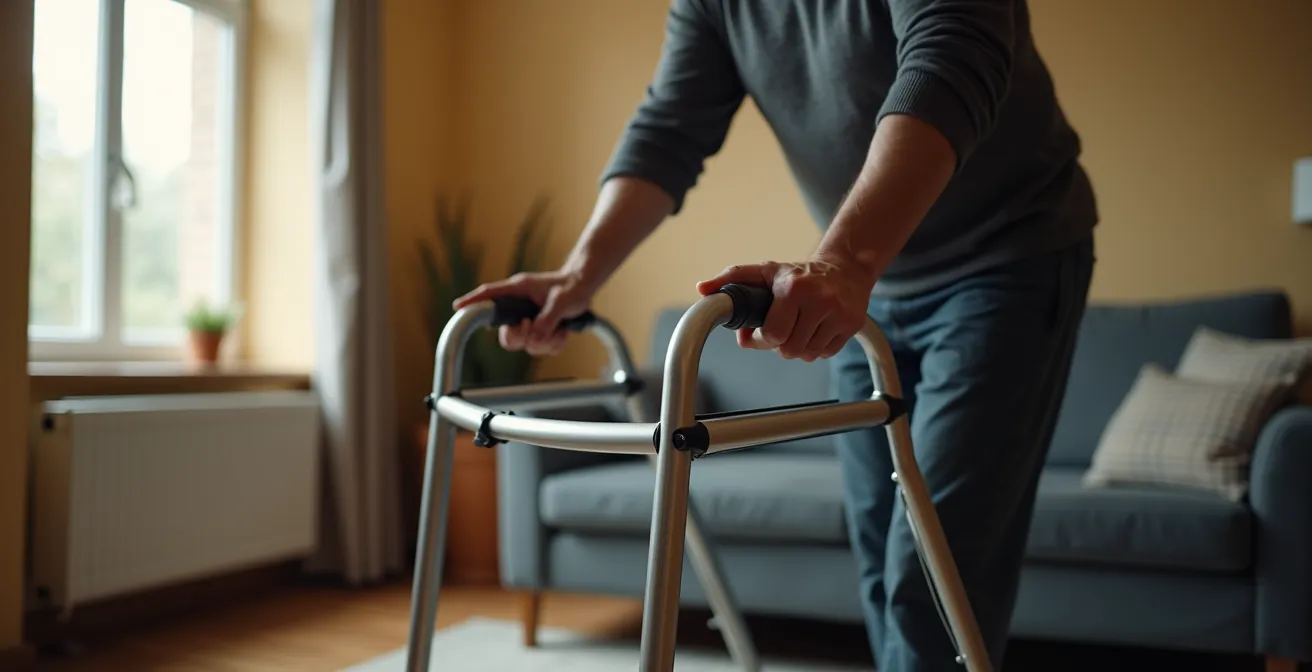
As the image demonstrates, proper alignment is key to safety and confidence. This technique is not just about preventing falls; it’s about building trust in the device so it becomes a natural extension of your movement. Mastering this is especially critical because, as data consistently shows, falls are a major risk. A recent analysis from the CDC confirms that falls are the leading cause of injury for adults ages 65 years and older, making the correct use of a mobility aid a non-negotiable part of fall prevention.
Think of your walker not as a cart to be pushed, but as a mobile piece of architecture that you inhabit as you move through your home.
The Brake-Locking Mistake That Causes Rollators to Slide Away
One of the most dangerous moments with a rollator isn’t when you’re walking, but when you’re transitioning from standing to sitting. Many users, especially when tired, will turn and sit on the rollator’s seat without first engaging the locking brakes. This can cause the rollator to roll backward, leading to a fall. The hand brakes on a rollator are not just for slowing down; they have a critical locking function that turns the device into a stable chair.
The mistake is treating the device like a fixed piece of furniture. It is not. It has wheels, and they will move at the most inopportune time unless they are locked. This requires building a consistent habit, a safety ritual that you perform every single time you intend to sit or stand up from the rollator. Forgetting this step can have serious consequences.
To prevent the rollator from sliding away, you must always follow a strict protocol. Experts at Carex, a manufacturer of mobility aids, outline a clear set of steps for this crucial transition. This protocol isn’t just a suggestion; it’s a fundamental safety procedure:
- Always push down the brake levers to lock the brakes before attempting to sit.
- Listen for the audible « click » that confirms the brakes are engaged.
- Test the lock by giving the rollator a gentle push. It should not move.
- Balance yourself with hands on both handles or on the sides of the seat before lowering yourself.
- When standing up, ensure the brakes are still locked and scoot to the edge of the seat before pushing up.
As a final back-up, especially when you are first learning this habit, it is wise to « park » your rollator against a solid object like a wall or a heavy piece of furniture before sitting. This provides an extra layer of security in case you forget to lock the brakes.
3-Wheel vs 4-Wheel Rollators: Which Is Truly More Maneuverable Indoors?
When assessing a rollator for a small apartment, the most important metric is not raw stability but indoor maneuverability. While a 4-wheel rollator offers a wider, more stable base ideal for outdoor terrain, this very feature can become a liability in a confined space. Its square footprint gives it a larger turning radius, making it clumsy in narrow hallways and tight spaces. A 3-wheel rollator, with its triangular base and single front wheel, is the undisputed champion of indoor agility.
This isn’t just about feeling; it’s about geometry. The 3-wheel design allows the device to pivot with a much smaller turning radius, easily navigating around furniture and through tight doorways where a 4-wheel model would require a cumbersome three-point turn. However, this agility comes at a cost. The triangular base is inherently less stable than a square one, making it less suitable for users who need to apply significant weight to the device for support.
Another key difference is the presence of a seat. A built-in seat is a standard feature on 4-wheel rollators, offering a convenient place to rest. Most 3-wheel models sacrifice this feature to save weight and maintain a smaller profile. Therefore, the choice becomes a clear trade-off based on the primary environment of use and the user’s specific needs. The following table breaks down these differences from a spatial design perspective.
| Feature | 3-Wheel Rollator | 4-Wheel Rollator |
|---|---|---|
| Maneuverability | Excellent in tight spaces | Good but needs more room |
| Turning Radius | Very small | Larger |
| Stability | Less stable, triangular base | More stable, square base |
| Seat | Usually no seat | Built-in seat standard |
| Best For | Narrow hallways, small bathrooms | General indoor/outdoor use |
| Weight | Lighter, easier to fold | Heavier, more sturdy |
For an urban senior whose primary challenge is navigating a compact apartment, the superior maneuverability of a 3-wheel rollator often outweighs the benefits of a 4-wheel model designed for more open environments.
When to Switch From a Cane to a Walker for Indoor Safety?
The transition from a cane to a walker is a significant step, and the decision should be guided by function and safety, not by sentiment. A cane provides support for one side of the body, which is helpful for minor balance issues or relieving pressure on a single leg. A walker, by contrast, provides a wide, stable base of support for the entire body. The moment a cane is no longer sufficient is when you start using it for tasks it wasn’t designed for, creating a safety risk.
Physical therapists point to clear, observable warning signs. If you find yourself leaning heavily on furniture as you walk through your home (a behavior known as « furniture surfing »), your cane is likely not providing enough support. The most critical indicator, however, relates to transitions. If you need to put most of your weight on the device to get up from a chair or to take a step, a cane is no longer safe. This is a clear signal that you require the broader support that only a walker can provide.
The decision should be seen as a proactive safety upgrade, not a sign of decline. A walker can prevent the one fall that leads to a serious injury and a loss of independence. Delaying the switch out of pride or a desire to avoid « looking old » is a dangerous gamble. It’s about choosing the right tool for the job. When the job of walking safely through your home becomes too difficult for a cane, it is time to upgrade your tool.
Ultimately, making the switch at the right time is an act of empowerment that allows you to continue navigating your own space with confidence and security.
The « Sentimental Clutter » Error That Blocks Walker Access
For a walker or rollator to be effective, it needs a clear, unobstructed path. The American with Disabilities Act (ADA) recommends a minimum clear width of 36 inches for accessible routes. While a home doesn’t need to meet full ADA compliance, this 36-inch rule is an excellent benchmark for safety and mobility. The most common barrier to achieving this is not random mess, but what can be called « sentimental clutter »—cherished items, stacks of books, or small side tables that have been in the same place for years and have emotional value.
The error is viewing the removal of these items as a loss, rather than as a strategic relocation. The goal isn’t to create a sterile, empty space, but to re-engineer your pathways for safe movement. This requires a shift in thinking: from floor-level storage to vertical storage. A beloved collection of knick-knacks on a low table blocking a hallway can be moved to a « memory shelf » at eye level, where it is still visible and cherished but no longer a tripping hazard.
Conducting a path clearance audit is a practical first step. This isn’t about massive decluttering; it’s a targeted design exercise to reclaim your primary routes—from bed to bathroom, and from kitchen to living room. The following checklist provides a structured way to perform this audit in your own home.
Your 5-Step Path Clearance Audit
- Map your most frequent daily routes (e.g., bed to bathroom, kitchen to living room) and identify the main pathways.
- Using painter’s tape, mark out a 36-inch minimum width along these routes to visualize the necessary clearance.
- Measure the clear opening of all doorways on your routes, and crucially, the turn-around space in essential rooms like the bathroom.
- Identify all items that intrude into this 36-inch path and categorize them: can they be moved vertically (to a shelf), relocated to a less-used area, or donated?
- Create a plan to move obstructing items, prioritizing the clearing of your most critical daily pathways first.
By clearing these essential pathways, you are not giving up your cherished possessions; you are redesigning your environment to support your continued independence within it.
The Bathroom layout Error That Makes It Impossible to Use a Walker
The bathroom is often the most challenging room in a small apartment and a major spatial trap. Even if a walker or rollator can fit through the doorway, the room’s internal layout can make it functionally useless. The most common error is a combination of an inward-swinging door, a narrow space between the toilet and the vanity, and a toilet positioned too close to a wall.
An inward-swinging door is a significant hazard. In a tiny bathroom, it can be impossible to close the door once you and the walker are inside. More dangerously, if a person falls and blocks the door, it can prevent emergency responders from entering. Simply reversing the door to swing outward is one of the most effective and low-cost safety modifications you can make. This single change can dramatically increase the usable space and safety of the room.
Another critical issue is the placement of the toilet. If it’s tucked into a tight alcove, there may be no room to position the walker in front for a safe sit-to-stand transfer. The user is forced to leave the walker at the door and « furniture surf » their way to the toilet, negating the walker’s purpose entirely. Before making any changes, you must test the actual positioning of the walker for toilet transfers to ensure there is adequate space to maneuver safely.
Here is a practical checklist for auditing and modifying your bathroom for walker accessibility:
- Measure the clear width of the bathroom doorway and assess the door’s swing radius. Consider reversing the door to swing outward.
- Remove any thick or loose bath mats, as these are major tripping hazards that can easily catch a walker’s legs.
- If a walker cannot reach the toilet or shower area, install permanent grab bars in those locations to ensure stable support.
- Test your ability to position the walker directly in front of the toilet and pivot safely. If this is not possible, the layout needs modification.
A truly accessible bathroom is one where the walker can be your constant companion, from the door to the toilet and back again, without compromise.
Key Takeaways
- For small apartments, maneuverability is more important than stability; a 3-wheel rollator often outperforms a 4-wheel model indoors.
- The best mobility aid is useless if it can’t navigate your home’s « spatial traps, » like narrow doorways and inward-swinging bathroom doors.
- A rollator isn’t just for walking; with its seat and storage, it can be used for « task-zoning » to carry meals and other items, preserving energy and independence.
How to Arrange Your Home Layout to Maintain Independence Without Help?
True independence at home is not just about being able to walk from point A to B. It’s about being able to perform daily tasks safely and efficiently without assistance. A properly chosen mobility aid, especially a rollator with a seat and basket, can become a powerful tool for « task-zoning. » This means using the device as a mobile hub to transport items, turning it from a simple walker into a personal assistant. Many users creatively use the seat to carry meals from the kitchen to the table, move laundry to the bedroom, or keep a remote, a book, and a blanket with them as they move to their favorite chair.
This simple act of using the rollator to carry things frees up your hands and, more importantly, conserves precious energy. Instead of making multiple trips, you can consolidate tasks. This concept fundamentally changes the relationship with the device; it becomes an enabler of activities, not just a support for walking. Arranging your home to support this involves creating « docking stations » for your rollator near key activity zones, ensuring it’s always within reach.
Ultimately, arranging your home for independence is an investment in your future safety. The stakes are high, as fall-related risks increase significantly with age. The CDC’s latest data is a stark reminder, showing that death rates due to unintentional falls increased for all older age groups in recent years, with the highest rates among those 85 and older. Proactively designing your space to work with your mobility aid is the most effective strategy for mitigating this risk.
Take the first step towards a safer, more accessible home by performing your own layout audit today. By thinking like a designer, you can transform your space from a series of obstacles into a landscape that supports your freedom.